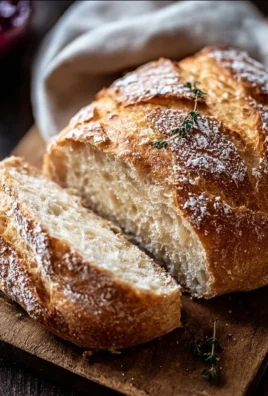
There’s something truly special about the smell of warm sourdough bread coming out of the oven, filling my kitchen with a cozy aroma that wraps around me like a favorite sweater. The crust is perfectly golden-brown, crunchy yet yielding to the soft, chewy interior, each slice bursting with that delightful tang only sourdough can offer. This bread has become a treasured staple in my kitchen; I bake it whenever I’m craving comfort or when friends come over for a leisurely weekend brunch.
Making sourdough is surprisingly easy and comes together fast, making it perfect for lazy Sundays or a weeknight project that feels a little more special. Whether you’re spreading creamy butter on a still-warm slice or serving it alongside a hearty soup, this bread shines in so many situations. And if there’s any leftover (which is rare!), it toasts beautifully the next day, transforming any simple topping into something extraordinary.
WHY I LOVE SOURDOUGH BREAD
Sourdough Bread
Sourdough is a true winner at my table! It hits that sweet spot between rustic charm and artisanal delight. Incredibly easy and undeniably delicious, it allows me to play with flavors and textures, making it feel elegant yet approachable. Every loaf is a little masterpiece, and the satisfaction of sharing it is unmatched—everyone deserves a slice of this goodness!
SOURDOUGH BREAD INGREDIENTS
The magic of this sourdough bread truly lies in its humble ingredients. Don’t worry about exact measurements just yet; those are all in the recipe card for you!
Essential Components
- 4 CUPS (500G) BREAD FLOUR OR ALL-PURPOSE FLOUR: The backbone of our loaf, giving it structure and that lovely chewy texture.
- 1⅔ CUPS (375G) WARM WATER: Helps activate the yeast in the sourdough starter, encouraging that crucial fermentation.
- 1 CUP (200G) ACTIVE SOURDOUGH STARTER: This little gem packs a mighty punch, providing the unique flavor and rise we crave in sourdough.
- 2 TEASPOONS (10G) SALT: Enhances the flavor and controls fermentation, ensuring we don’t just have bland bread!
SUBSTITUTIONS AND TIPS
Need a swap? Here are a few ideas to spice things up or simplify your baking journey:
- ALL-PURPOSE FLOUR: You can mix in whole wheat flour for a nuttier flavor, though it won’t be quite as airy.
- SOURDOUGH STARTER: If you don’t have one, you can use commercial yeast. Just adjust the quantities and rise times accordingly.
- WATER TEMP: Use cool water if you’re in a warm environment to slow down fermentation; just keep an eye on rising times.
- SALT: Experiment with different types of salt, like sea salt or Himalayan salt, but keep the amount similar for balance.
KITCHEN TOOLS YOU’LL NEED
- Large mixing bowl
- Dutch oven (or any heavy pot with a lid)
- Measuring cups
- Kitchen scale (for precision)
- Plastic wrap or a clean kitchen towel
- Parchment paper
- Proofing basket (or a towel-lined bowl)
HOW TO MAKE SOURDOUGH BREAD
Let’s dive into creating this wonderfully rustic sourdough bread. I’ve broken down the process into simple steps, and follow along, and you’ll have a delicious loaf in no time! We’re aiming for a crusty exterior and a fluffy, airy interior with each slice.
Time to Mix and Rest
In a large mixing bowl, combine 4 cups of flour and 1⅔ cups of warm water. Stir until a shaggy dough forms and let it rest for 30 minutes. This step is key as it allows the flour to hydrate properly, making the dough easier to work with later.
Bring on the Flavor
After resting, add 1 cup of active sourdough starter and 2 teaspoons of salt. Mix well until everything is fully combined. You want a cohesive dough that’s a little tacky but not overly sticky, which is an inviting sign of tasty bread ahead.
Let the Dough Rise
Cover the bowl with a clean towel or plastic wrap and let the dough sit at room temperature. Every 30 minutes for 2 hours, perform a set of stretch and folds: pull one side of the dough upward and fold it over itself. Turn the bowl a quarter turn and repeat three more times. This helps develop the gluten structure, so don’t skip it!
The Big Rise
After the final fold, cover the bowl again and let the dough rise for 6 to 8 hours until it doubles in size and appears bubbly and puffy. You’ll want to keep an eye on it, as every kitchen has its own personality when it comes to fermentation.
Shape It Up
Gently transfer the dough to a lightly floured surface. Shape it into a round or oval loaf by folding and tucking the edges underneath. This process creates tension on the surface of the dough, giving you a beautiful crust when it bakes.
Time to Proof
Place the shaped dough seam-side up into a floured proofing basket or a towel-lined bowl. Cover and refrigerate for 8 to 12 hours. This cold fermentation enhances the flavor and allows the dough to develop even more character.
Heat Things Up
The next day, place your Dutch oven into your oven and preheat to 450°F (232°C). This preheating is essential for getting that perfect crust!
Score for Style
Remove the dough from the fridge and turn it out onto parchment paper. Score the top with a sharp knife or razor blade. This allows the bread to expand properly in the oven, and let’s be honest, it looks pretty darn beautiful too!
Into the Oven
Carefully lower the dough into the hot Dutch oven using the parchment paper. Cover and bake for 20 minutes.
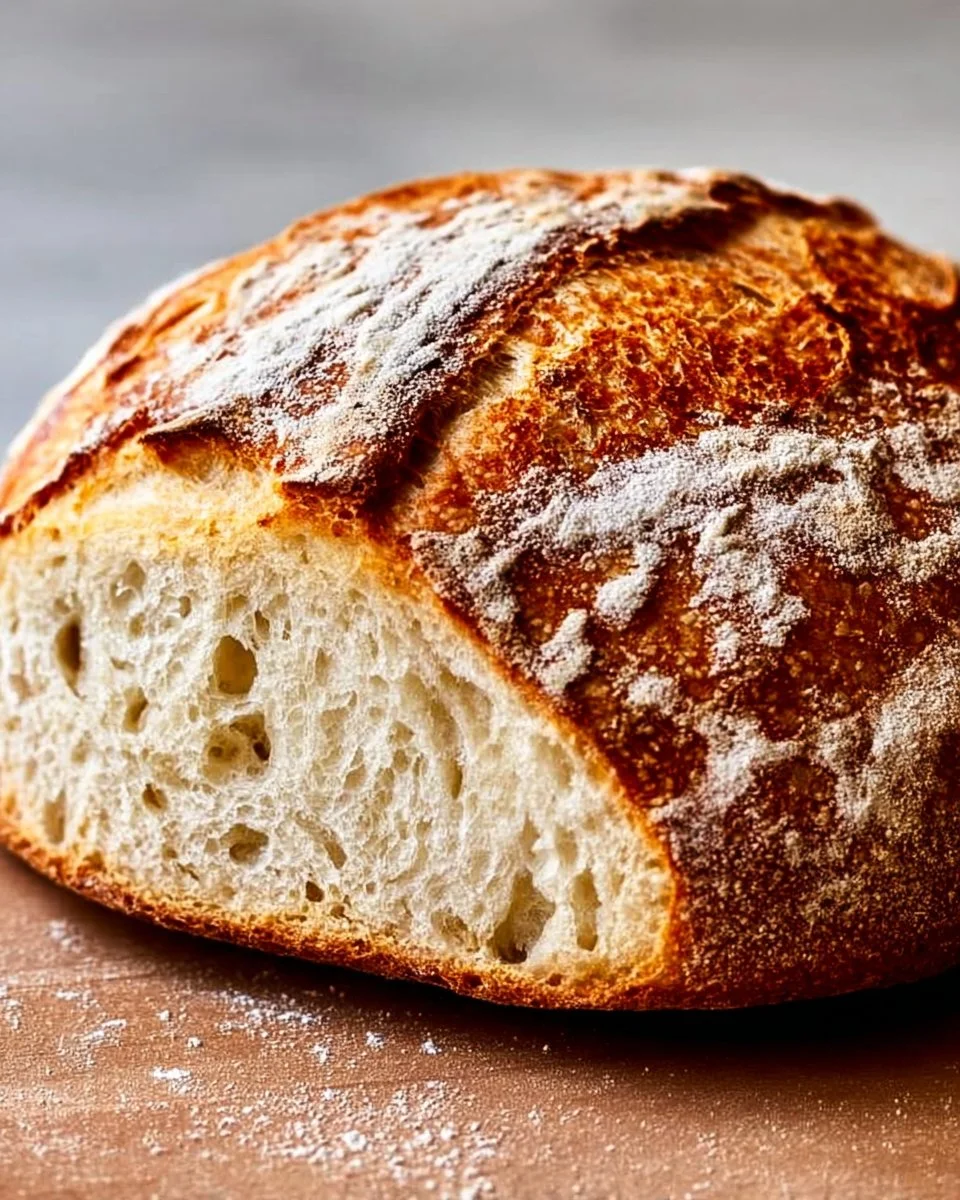
Unleash the Crust
Remove the lid and bake uncovered for another 25 minutes. Keep an eye on it; I like to wait until it’s deep golden brown, which means the crust is going to be delightful.
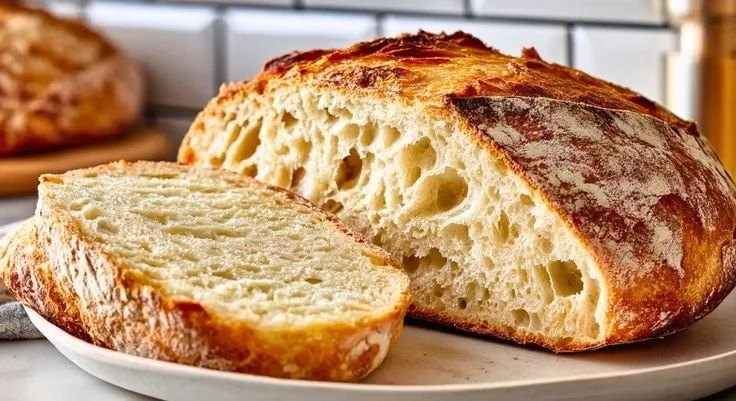
Cool and Enjoy
Take the bread out of the Dutch oven and let it cool completely on a wire rack before slicing. The aroma wafting through your kitchen is pure bliss!
HOW TO STORE SOURDOUGH BREAD
Leftover sourdough is a treat! You can keep it at room temperature, wrapped in a cloth for up to 3 days. If you need to store it longer, pop it in an airtight container in the fridge for 3-4 days, or freeze it for up to 2-3 months. Just let it thaw at room temperature and enjoy it toasted back to life!
TIPS FOR SUCCESS
- Make sure your sourdough starter is active and bubbly for best results.
- Use a kitchen scale for precise measurements—it makes a difference!
- If your dough feels sticky, resist the urge to add too much flour; a wet dough is key for that coveted rise.
- Don’t rush the fermentation; patience is essential for flavor development.
- A sharp blade is essential for creating good score marks—a dull knife can drag and ruin the surface.
SERVING SUGGESTIONS
- Pair slices with creamy butter and a sprinkle of sea salt for a simple treat.
- Serve alongside a fragrant bowl of soup or stew for a comforting meal.
- Layer with fresh avocado, a squeeze of lemon, and chili flakes for a vibrant toast.
- Enjoy with a slice of cheese and some charcuterie for an effortless appetizer.
- For a sweet touch, spread on homemade jam or a dollop of honey.
I hope you enjoy baking this sourdough bread as much as I do! It’s not just a recipe; it’s a labor of love that fills the heart and home with warmth. Happy baking!