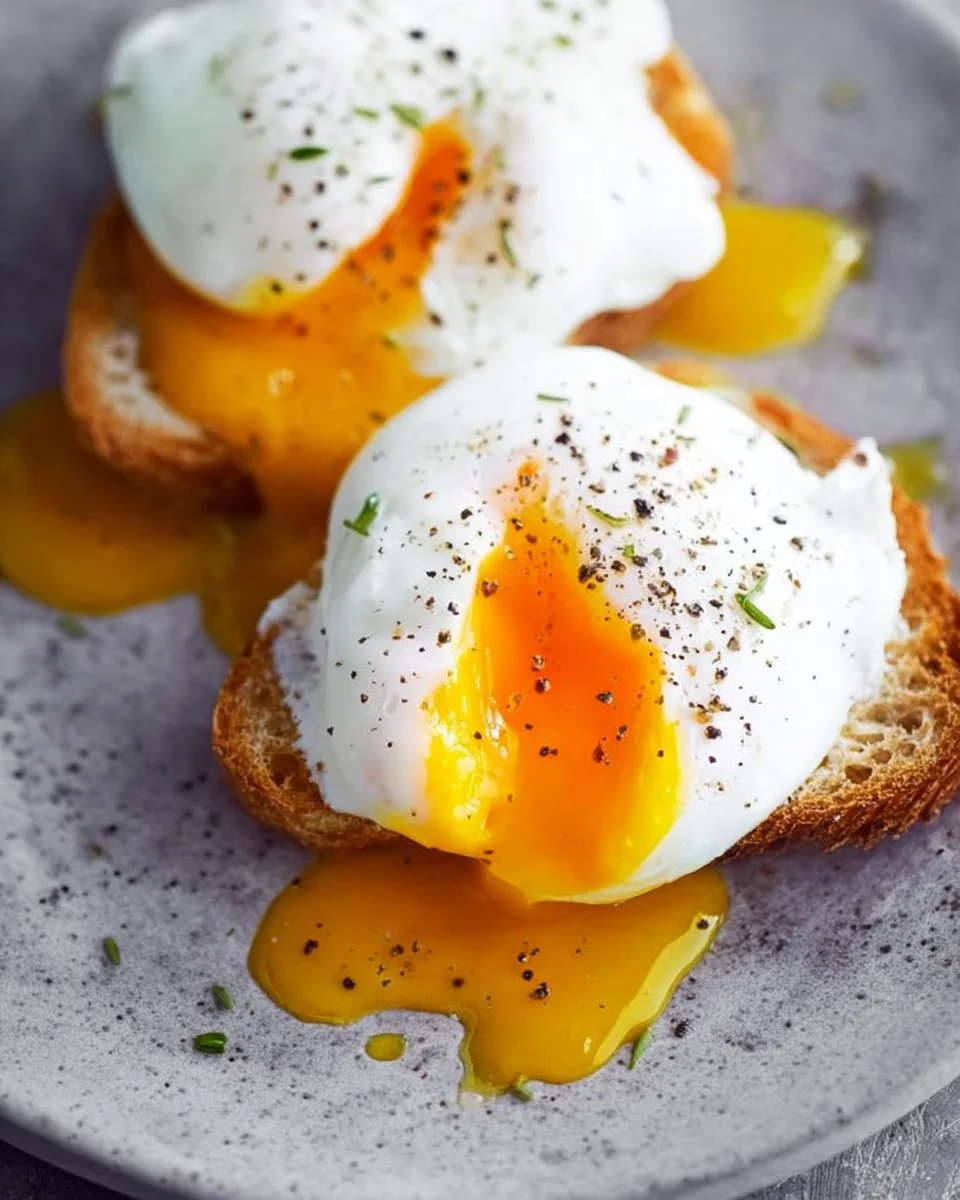
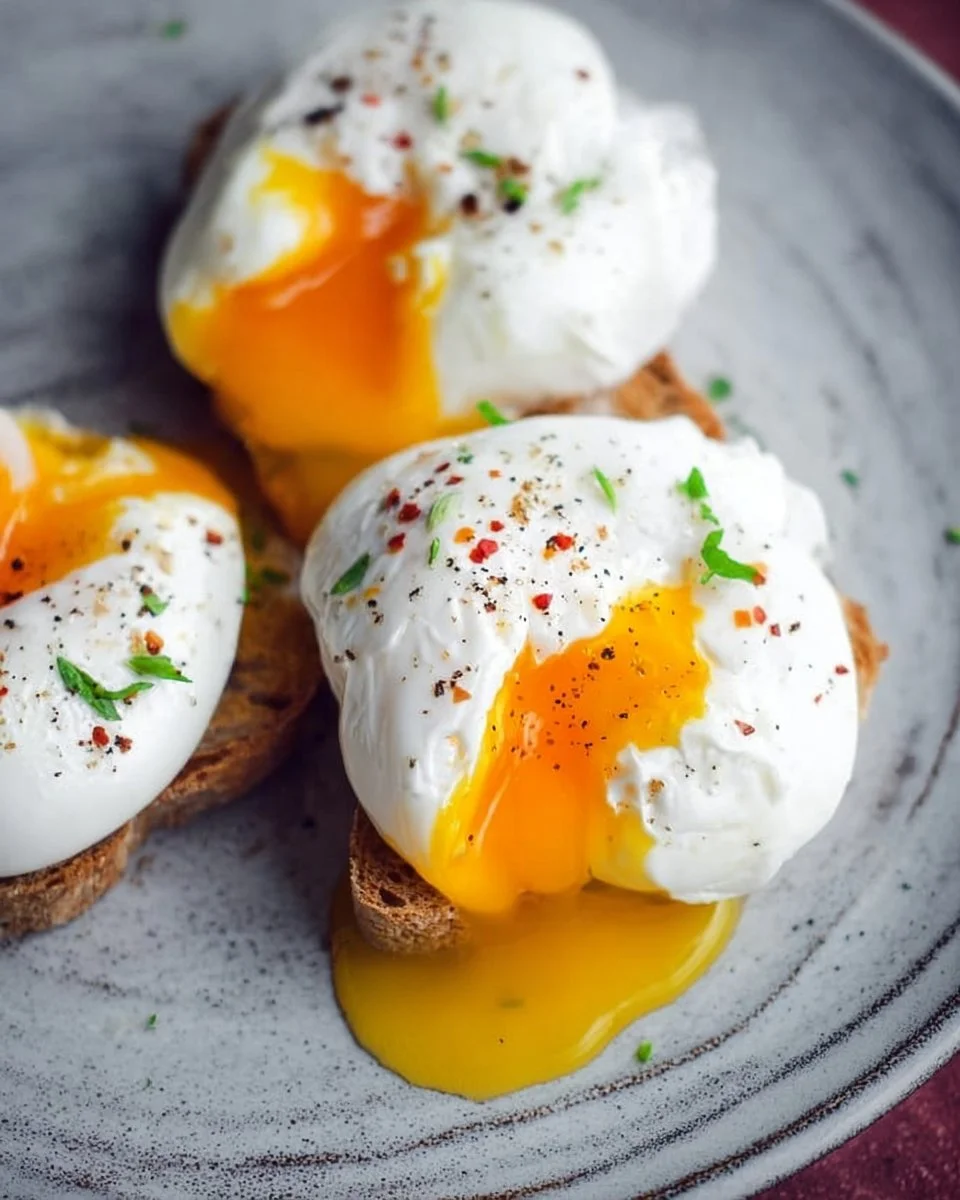
There’s something truly special about a perfectly poached egg. With its delicate, tender white hugging a luscious, golden yolk that oozes out with the gentlest nudge, it’s a dish that sings with both elegance and comfort. Watching that yolk cascade over buttery toast or fresh greens fills my heart with warmth—it’s a staple in my kitchen and always a favorite for brunch gatherings.
I’ve found that poaching eggs comes together surprisingly fast. It’s the kind of dish that’s perfect for a busy weeknight or a lazy Sunday morning, effortlessly elevating anything from simple avocado toast to a hearty breakfast bowl. Leftover poached eggs? They can be swiftly incorporated into salads or grain bowls, making them a versatile star in my culinary repertoire.
Why I Love How to Poach an Egg
How to Poach an Egg is a true winner at my table! This technique hits that sweet spot of being incredibly easy and undeniably delicious. The flavor profile is rich yet bright, and the elegant presentation always impresses guests. Plus, I love that poaching is a guilt-free cooking method—there’s no added fat, just pure precious protein goodness.
How to Poach an Egg Ingredients
The magic of this poached egg truly lies in its simplicity. You don’t need much—just a few humble ingredients that become something truly delightful. Don’t worry about exact measurements just yet; those are all in the recipe card for you!
Core Ingredients and Their Roles
- FRESH EGGS: These are the stars! Fresh eggs yield the best poached results, with the whites holding together beautifully around that rich yolk.
- WATER: This is the canvas for our egg! A gentle simmer is key to creating the perfect poaching environment.
- VINEGAR (OPTIONAL): A splash of vinegar can help the egg whites stay in place, creating a neater presentation. It’s optional, but a nice touch!
- SALT (TO TASTE): Just a little sprinkle enhances the flavor, allowing that eggy goodness to shine.
Need a Swap?
Want to switch things up? If you find yourself short on fresh eggs, you can try using liquid egg whites instead; just keep in mind it won’t have that golden yolk richness. Feel free to experiment with different vinegars—apple cider vinegar adds a subtle fruitiness, while white vinegar keeps it classic. If you’re not a fan of vinegar at all, it’s okay to leave it out (though it does help the whites hold together).
Kitchen Tools You’ll Need
- Medium saucepan (about 2-3 quart)
- Slotted spoon (for easy egg retrieval)
- Small bowl (to crack your eggs into)
- Whisk (optional, for swirling)
- Paper towels (to drain the eggs)
- Heatproof spatula (for any adjustments)
How to Make How to Poach an Egg
Let’s dive into creating this wonderfully simple dish. I’ve broken down the process into simple steps. Follow along, and you’ll have a delicious meal in no time. We’re aiming for perfectly set whites that cradle a gloriously runny yolk!
Fill the Pot with Water and Heat
First, fill a medium saucepan with water and bring it to a gentle simmer over medium heat. You want a soft shimmering surface, not a full-on rolling boil; this step is key to ensuring a gentle poaching process.
Add a Splash of Vinegar
Next, if you’re using vinegar, add a splash to the simmering water. This helps the egg whites firm up nicely, creating that neat, beautiful shape we all desire. It’s a simple trick that goes a long way!
Crack an Egg into a Small Bowl
Now, crack a fresh egg into a small bowl. This makes it easier to slide into the water without breaking the yolk—trust me, this step saves you from frustration down the line!
Swirl and Create a Vortex
Once the water is simmering, use a spoon to swirl the water, creating a gentle vortex. The movement will help wrap the egg white around the yolk as you slide it in. Gently slide the egg into the center of the vortex—it’s like making a cozy little nest for it!
Cook Until the Whites Set
Cook the egg for about 3-4 minutes. You’re looking for the whites to be set but the yolk still gloriously runny. Imagine the perfect soft-boiled egg—this moment creates that instantly!
Retrieve the Egg with a Slotted Spoon
Once it’s done, use a slotted spoon to gently lift the egg from the water. Give it a moment to drain on a paper towel; this way, you won’t end up with waterlogged toast!
Season and Enjoy!
Finally, sprinkle a little salt to taste, and enjoy your poached masterpiece! Whether it’s served on toast, over greens, or simply on its own, you’re in for a treat!
How to Store How to Poach an Egg
If you have leftovers, you can store your poached eggs in the fridge! They keep well in an airtight container for about 3-4 days. If you want to freeze them, they last about 2-3 months—just make sure to thaw them in the fridge overnight before reheating. When it’s time to enjoy them again, simply warm them gently in hot water to maintain that luscious texture.
Tips for Success
- Always use the freshest eggs you can find; they’re key for the best results.
- Avoid boiling the water too hard; a gentle simmer is crucial.
- Don’t overcrowd the pot; cook one or two eggs at a time for optimal poaching.
- If the egg doesn’t come out perfect, don’t stress! Consider it a learning curve—practice makes perfect.
Serving Suggestions
- Serve over buttery toast with a sprinkle of crushed red pepper flakes.
- Pair with sautéed spinach and feta for a delightful breakfast bowl.
- Top your favorite grain salad and drizzle with lemon vinaigrette.
- Enjoy alongside crispy bacon or smoked salmon for an indulgent treat.
- Add fresh herbs or microgreens for a beautiful finishing touch!
Happy poaching, friends! I can’t wait to hear how your eggs turn out.