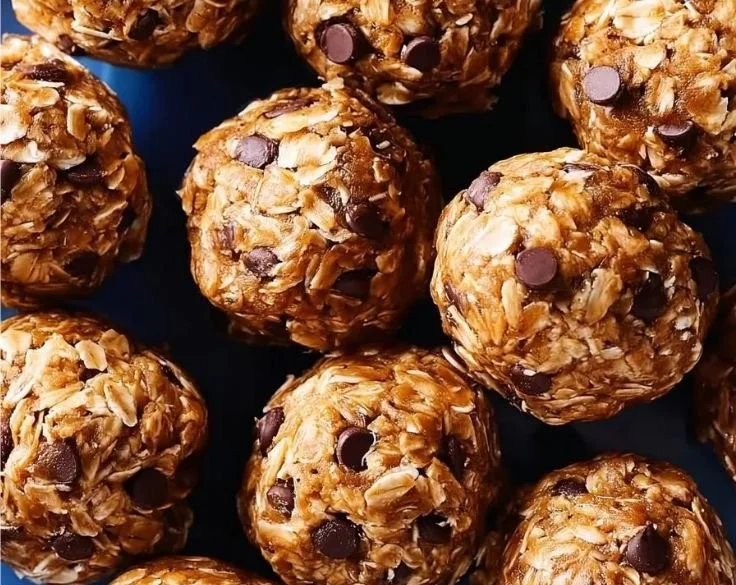
There’s something truly special about these No-Bake Protein Balls. They’re little gems of delight, bursting with a comforting mix of nutty, sweet flavors and a satisfying chewiness that makes each bite a treat. The blend of creamy peanut butter, sticky honey, and crunchy chocolate chips creates a symphony of textures that is just too delicious to resist. I whip these up whenever I need a quick snack or a pick-me-up—a wholesome energy boost that feels more indulgent than it should!
These protein-packed bites come together surprisingly fast and are perfect for busy weeknights or mid-afternoon slumps. Whether I’m rushing out the door or just craving a wholesome treat, I know I can stash these in the fridge and grab one (or two!) anytime. Plus, they’re incredibly versatile and can be enjoyed by everyone, making them an absolute staple in my kitchen.
WHY I LOVE NO-BAKE PROTEIN BALLS
These No-Bake Protein Balls are a true winner at my table! They hit that sweet spot between healthy and delicious, making it easy to indulge without the guilt. The best part? They’re incredibly easy to make and require zero baking—just mix, roll, and chill! I love how customizable they are too; you can add your favorite mix-ins and flavors for a unique twist every time!
NO-BAKE PROTEIN BALLS INGREDIENTS
The magic of these No-Bake Protein Balls truly lies in their simple yet powerful ingredients. Don’t worry about exact measurements just yet; those are all in the recipe card for you!
Essential Components:
- ROLLED OATS: These are the stars! They provide a hearty base and add a wonderful chewiness that keeps you feeling satisfied.
- PEANUT BUTTER: This rich, creamy goodness lends flavor and healthy fats that make these bites oh-so-indulgent.
- HONEY: Adding a touch of natural sweetness, honey helps bind everything together while giving that lovely sticky texture.
- PROTEIN POWDER: This little powerhouse packs a protein punch, making the balls a satisfying snack for any time of day.
- CHOCOLATE CHIPS: Sweet and simply irresistible, these little bites of joy add an element of indulgence that makes you feel like you’re treating yourself.
- VANILLA EXTRACT: A splash of this aromatic delight enhances the overall flavor, making each bite sing.
SUBSTITUTIONS AND TIPS
Need a swap? Here are some tasty alternatives and tips to customize your protein balls!
- ALMOND BUTTER instead of peanut butter adds a different flavor profile (though it won’t be quite as rich).
- AGAVE SYRUP can replace honey for a vegan twist.
- Swap in CHIA SEEDS or FLAXSEEDS for added nutrition—just be sure to adjust the moisture a bit.
- For a burst of flavor, try adding a sprinkle of cinnamon or cocoa powder!
- If you find the mixture too sticky, just toss in a few extra oats until you reach your desired consistency. It’s all about finding what works best for you!
KITCHEN TOOLS YOU’LL NEED
- Mixing bowl (medium)
- Measuring cups and spoons
- Spatula or wooden spoon
- Baking sheet or plate
- Parchment paper (optional for easy cleanup)
- Refrigerator

HOW TO MAKE NO-BAKE PROTEIN BALLS
Let’s dive into creating these incredibly delicious No-Bake Protein Balls. I’ve broken down the process into simple steps, so follow along, and you’ll have a delicious snack in no time. We’re aiming for quick energy bites that are packed with flavor and nutrition—ready?
Mix the Base Ingredients
First, in a mixing bowl, combine the ROLLED OATS, PEANUT BUTTER, HONEY, PROTEIN POWDER, CHOCOLATE CHIPS, and VANILLA EXTRACT. This is key—the combination is what creates that delicious, chewy consistency that holds everything together. Give it a good stir until everything is well incorporated.
Get Your Hands Dirty!
Next, once the mixture is nicely combined, it’s time to get rolling—literally! Using your hands, roll the mixture into small balls, about 1 inch in diameter. This part is so much fun, and when you’re done, you’ll have a platter of energy-infused goodness.
Arrange Them on a Plate
Now, place the protein balls on a baking sheet or plate. Don’t worry about spacing them too far apart since they aren’t going to expand—keep them close together for convenience.
Chill to Set
Once they’re all rolled out, pop the plate in the refrigerator for about 30 minutes to set. This will help them firm up and give you that satisfying bite we’re all looking for.
Enjoy Your Healthy Snack!
Finally, take them out, and voilà—your No-Bake Protein Balls are ready to enjoy! These delicious bites make for a perfect grab-and-go snack, great for any time you need a quick energy boost.
HOW TO STORE NO-BAKE PROTEIN BALLS
These protein balls store really well, so don’t worry too much about leftovers! You can keep them at room temperature for up to a day or two if it’s cool, but I prefer to stash them in the fridge in an airtight container where they’ll last about 3-4 days. For longer-term storage, throw them in the freezer and enjoy them within 2-3 months. Just let them thaw a bit before indulging!
TIPS FOR SUCCESS
- Use creamy peanut butter for easy mixing and the best texture.
- If your mixture feels too dry, add a splash more honey or peanut butter for that perfect stickiness.
- Give different mix-ins a go, like shredded coconut or chopped nuts, to keep things exciting!
- Make sure to chill them long enough for optimal texture—they’re best when they’re a little firm.
SERVING SUGGESTIONS
- Enjoy as a post-workout snack to refuel!
- Pair with a piece of fruit for a rounded snack.
- Serve them on a platter at your next get-together for a fun nibble.
- Pair with a warm cup of tea or coffee for an afternoon pick-me-up.
- Garnish with a sprinkle of sea salt to enhance the sweetness!
Now that you’re armed with this delightful recipe, I can’t wait for you to try these No-Bake Protein Balls! They’re a simple, wholesome treat that will quickly become a favorite in your home, just as they are in mine. Happy snacking!