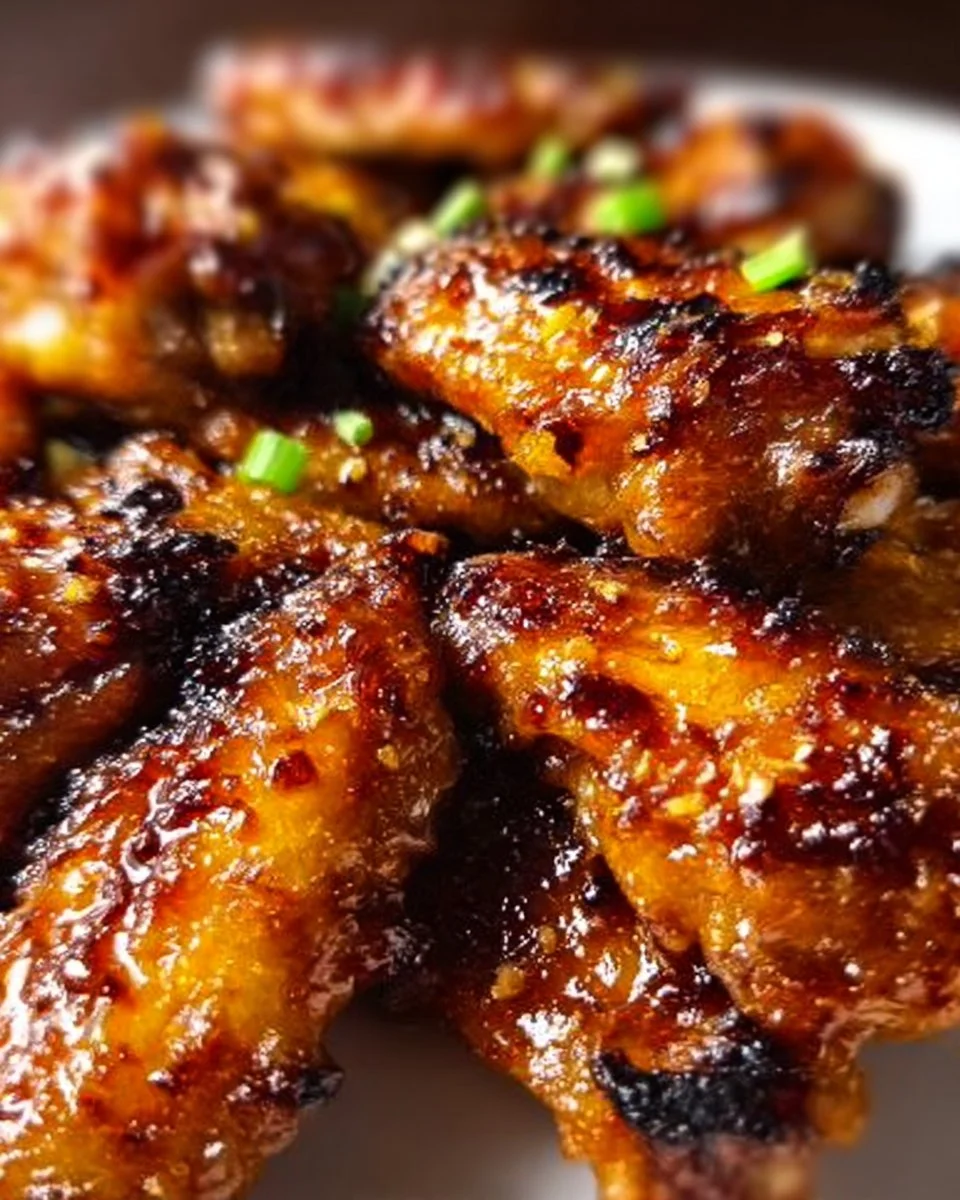
There’s something truly special about the combination of sweet, tangy pineapple and savory teriyaki sauce. When you bite into these Pineapple-Teriyaki Chicken Wings, you’re met with a crispy exterior that gives way to juicy, tender meat, all enveloped in a luscious glaze that dances on your taste buds. The vibrant colors and tantalizing aroma fill the kitchen, making it impossible not to smile! I love making these wings for gatherings or cozy nights in, as they’re a guaranteed crowd-pleaser that brings everyone together.
This recipe comes together surprisingly fast, making it perfect for busy weeknights when you crave something delicious yet simple. Whether you’re serving them at a party, enjoying a game day, or just hanging out with family, these wings will steal the show. And the best part? They are just as delightful the next day—if you manage to have any leftovers!
WHY I LOVE PINEAPPLE-TERIYAKI CHICKEN WINGS
Pineapple-Teriyaki Chicken Wings are a true winner at my table! They’re incredibly easy and undeniably delicious, hitting that sweet spot between savory and sweet. The bold flavors mingle beautifully, creating a dish that’s both casual and impressive, perfect for any occasion. Seriously, they’re a staple I always keep in my back pocket.
PINEAPPLE-TERIYAKI CHICKEN WINGS INGREDIENTS
The magic of these Pineapple-Teriyaki Chicken Wings truly lies in the vibrant balance of flavors and the simplicity of their components. Don’t worry about exact measurements just yet; those are all in the recipe card for you!
CORE INGREDIENTS AND THEIR ROLES
- CHICKEN WINGS: The stars of the show! These little gems pack a mighty punch, turning wonderfully crispy while maintaining juicy meat underneath.
- PINEAPPLE JUICE: Adds the perfect touch of sweetness and a tangy flavor that beautifully contrasts with the savory elements.
- TERIYAKI SAUCE: This rich, umami-packed gem brings depth to the wings, coating them in a sticky-sweet layer that’s irresistible.
- SOY SAUCE: Enhances the overall flavor, adding a lovely saltiness that rounds out the dish.
- HONEY: A touch of nature’s sweetness that makes the glaze luxuriously smooth and sticky.
- GARLIC POWDER: Infuses a warm, aromatic flavor that elevates the entire dish.
- GINGER POWDER: Brings a zesty kick that complements the sweetness beautifully.
- SALT AND PEPPER: Essential for seasoning, helping to bring out the natural flavors of the wings.
- GREEN ONIONS: For garnish! They add a pop of color and a fresh crunch to finish things off.
SUBSTITUTIONS AND TIPS
Need a swap? You bet! Here are a few ideas if you’re looking to tweak this recipe:
- Chicken Thighs can work instead of wings; just adjust the cooking time since they may take a bit longer.
- If you’re out of pineapple juice, orange juice is a nice alternative, though it will impart a different flavor profile.
- For a slightly smoky flavor, add a splash of liquid smoke to the glaze.
- When time is tight, use store-bought wing sauce instead of making the glaze from scratch (though you might miss that rich pineapple flavor).
KITCHEN TOOLS YOU’LL NEED
- Baking sheet (rimmed preferred)
- Parchment paper (for easy cleanup)
- Large mixing bowl
- Whisk
- Tongs (for flipping the wings)
- Sharp knife (for chopping green onions)
- Measuring cups and spoons

HOW TO MAKE PINEAPPLE-TERIYAKI CHICKEN WINGS
Let’s dive into creating these delightful Pineapple-Teriyaki Chicken Wings. I’ve broken down the process into simple steps, so follow along, and you’ll have a delicious meal in no time. We’re aiming for that perfect balance of crispiness and savory-sweet flavor!
PREHEAT AND PREPARE
First, preheat your oven to 400°F (200°C). This step is crucial for achieving that golden, crispy skin we all love. While it warms up, you can get everything else ready.
MIX THE GLAZE
Next, in a large bowl, mix together pineapple juice, teriyaki sauce, soy sauce, honey, garlic powder, and ginger powder. This flavor-packed glaze is the heart of the dish! It should smell absolutely divine by now.
SEASON THE WINGS
Now, season the chicken wings with salt and pepper. Don’t be shy—this step is key. Then, toss them in the flavorful glaze until they’re fully coated.
ARRANGE FOR BAKING
Once your wings are coated, arrange them on a baking sheet lined with parchment paper. This will prevent sticking and make cleanup a breeze. Spread them out evenly to ensure they cook perfectly.
BAKE TO CRISPY PERFECTION
Bake in the preheated oven for 25-30 minutes, flipping halfway through. You want that skin to be golden brown and crispy, while the meat becomes beautifully tender. The smell wafting through your kitchen is simply amazing!
GLAZE AND GARNISH
After removing them from the oven, toss the wings in any remaining glaze. This will amp up the flavor even more. Finally, garnish with chopped green onions before serving. They add a fresh crunch that elevates the dish to a whole new level.
HOW TO STORE PINEAPPLE-TERIYAKI CHICKEN WINGS
These wings keep surprisingly well! If you have leftovers (lucky you), store them in an airtight container in the refrigerator for up to 3-4 days. If you want to freeze them, pop them in a freezer-safe container for 2-3 months. To reheat, simply bake them at 350°F (175°C) until warmed through, ensuring that they retain their delightful crispiness.
TIPS FOR SUCCESS
- Pat the chicken wings dry with paper towels before seasoning; this helps achieve a crispier texture.
- Don’t overcrowd the baking sheet; give your wings space for maximum crunch.
- Keep an eye on them during the last few minutes of baking to avoid burning the glaze.
- Use high-quality sauce ingredients for the best flavor; a little extra love goes a long way!
SERVING SUGGESTIONS
- Serve with a side of creamy coleslaw for a refreshing crunch.
- Pair with a cool cucumber salad for contrast.
- Enjoy alongside some fluffy jasmine rice to soak up extra glaze.
- A chilled beer or sparkling water complements these wings beautifully.
- Garnish with sesame seeds for an extra touch of elegance.
I hope you enjoy making these Pineapple-Teriyaki Chicken Wings as much as I do! They truly have a way of bringing people together and creating delicious memories. Happy cooking!